OK, so I forgot I had a blog. Shut up.
Let me make it up to you with pics of what I did instead of carving a jack-o-lantern this year. I've had this plaster Frankenstein head floating around for a couple years...
That's a stock photo from one of the million websites selling these things. I forgot to take a picture of it before I started. Oops.
Step One: Priming. There was no way I was going to try to get coverage on white plaster. So a nice coat of Citadel Chaos Black later...
...and I was ready for
Step Two: Base Color. I mixed up a really murky dark green, and thinned it so that it would get into all the crevices. It's not 100% opaque when it's that thinned out, so the effect was a deep green that verges on black--perfect for the shadows I want the finished product to have.
Step Three: Mid-Tone. This where we start creating depth. I did this as a series of drybrushings so it would blend nicely into the shadowed crags and crevices without filling them in. Took a while (and ruined a couple brushes), but I got what I was after. (My daughter will be pissed that she's in the background of this picture.)
Step Four: Highlights. It looks like I went too bright here, but I didn't. It also looks like I haven't blended enough, but I don't need to. Trust me. The next step will blend the whole thing together and give us a full range of light to dark...
Step Five: Washes. I mixed up a series of light washes that, as they built up, smoothed out the color (but not too much).
Step Six: Detailing. Once the washes were dry, I painted the stitches, staples, and bolts.
Step Seven: Sealant. We started with a Citadel product, and we finished with one. The sealant not only protects the paint job, it completes the look I was hoping to achieve: this thing bears an
uncanny resemblance to the Frankenstein mask I wore for Halloween in 1977! (Right now my mom is reading this and thinking to herself, "Holy shit...it really does!")
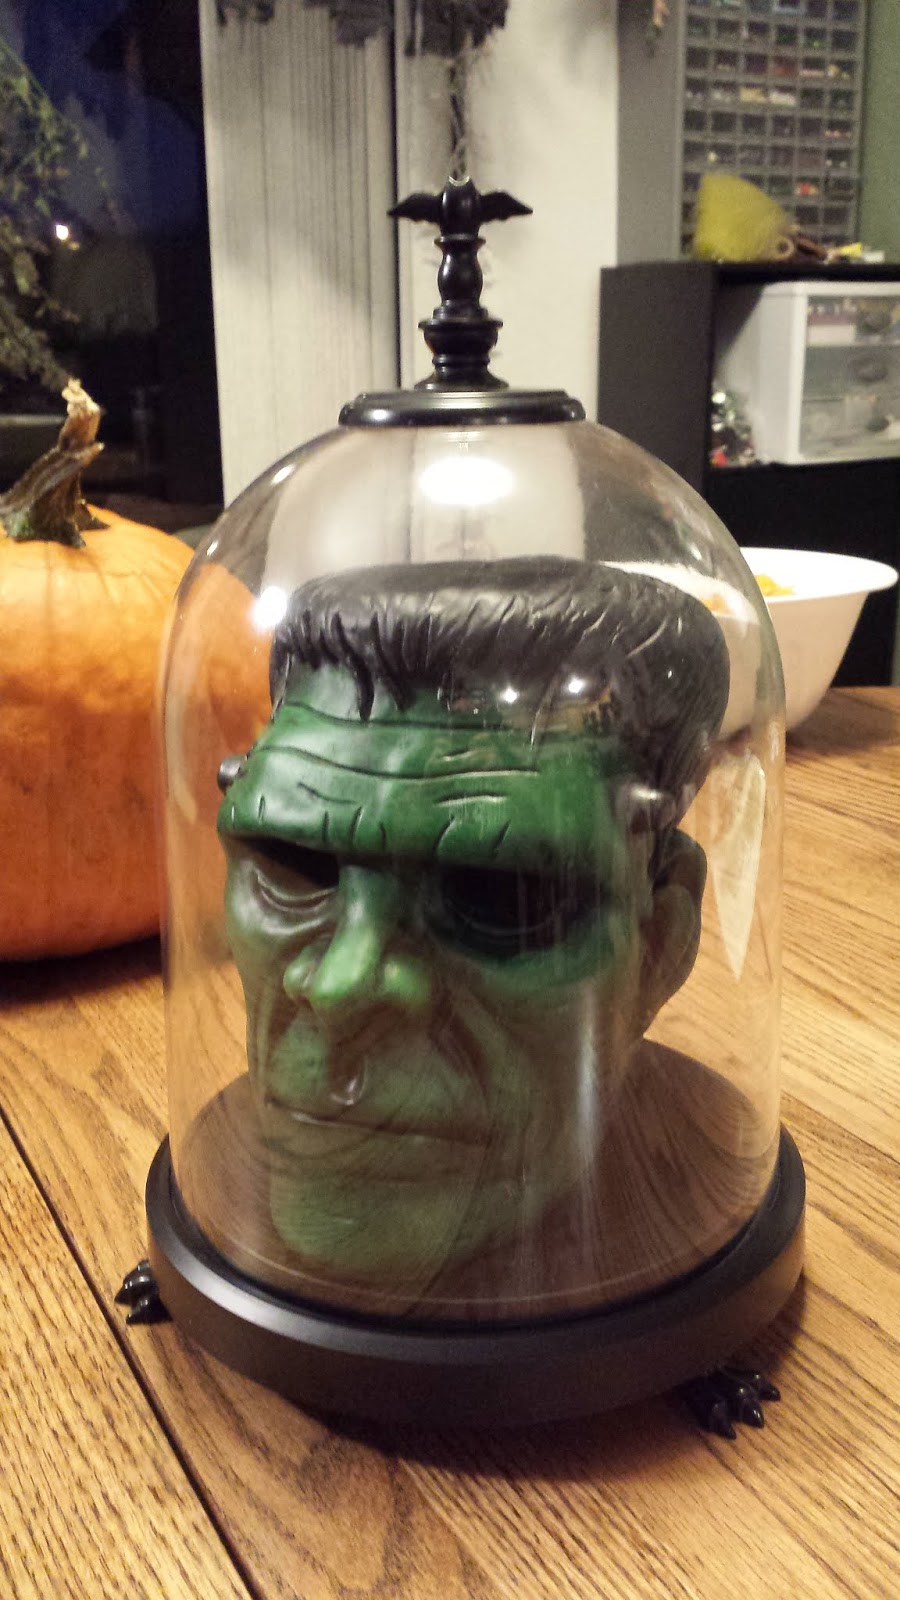
We're using this as a centerpiece for our table from now on (Halloween decorations go up in this house, but they never come down). It fits perfectly in this fake glass dome from Target's Halloween section.
I was having a hard time coming up with something interesting to do with my pumpkin this year, so I opted for this project instead. I'm very glad I did. The head is hollow, so as a last-minute addition, I'm going to try to light the eye sockets tomorrow.
Happy Halloween!


No comments:
Post a Comment